Small mistakes during radiant floor heating installation can lead to system failures, cold spots, or even voided warranties. By knowing the most common errors and how to avoid them, you’ll save time, protect your investment, and ensure your floors heat evenly. We’ve put together a list of some of the most common installation mistakes to watch out for.
1. Skipping Resistance & Continuity Checks
Always use a multimeter to check resistance before, during, and after installation. Often, people rely solely on audible or visual signals without measuring. This can cause hidden faults or broken cables that only show up after tiling. The warranty of the system may also be voided if testing is not performed and written down. Check resistance with a multimeter before, during, and after installation. Record the values and compare them to the manufacturer’s specifications.
2. Using the Wrong Circuit Type
For radiant floor heating systems with a thermostat that already has GFCI protection, a standard circuit breaker is needed. If the thermostat already includes GFCI protection, connecting it to another GFCI can cause nuisance tripping and safety issues. Use a standard circuit breaker unless the manufacturer specifies otherwise. If you purchased your thermostat from Warm Your Floor, it already has GFCI protection, so a standard circuit breaker is required.
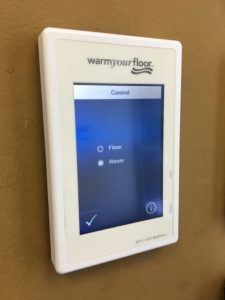
3. Sensor Wire Errors
Sometimes two sensor wires are installed and both are connected to the thermostat. Only one sensor wire should be connected at a time. Sometimes our customers forget to install a floor sensor wire altogether. Without a sensor in the floor, the thermostat cannot accurately measure floor temperature, which leads to overheating or insufficient heat. Install one sensor in the floor and connect only that one to the thermostat. Leave the second sensor bundled as a backup.
4. Installing Heating Under Fixtures or Tiles
During installation of fixtures like toilets or shower doors, installers sometimes accidentally place heating cables beneath those fixtures. The cable might get pinched or damaged when the fixture is set and heat cannot pass through the cable. Plan your layout carefully and mark fixture zones before laying cable. Keep heating cables only in open floor areas.
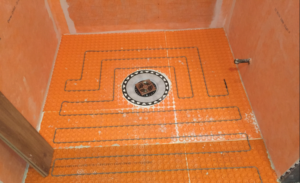
5. Power Connected Too Early
Never hook up the heating cable to power until the final floor covering is completely installed and all resistance tests are passed. Turning on power too early risks damaging the cable, compromising safety, or failing warranty requirements. Test only with a multimeter until tile, grout, and mortar have fully cured.
6. Not Ordering the Correct Amount of Membrane and Cable
You must have enough membrane to cover all finished floor area. You must also only use heating cable over the usable heated area (exclude built-in items, fixtures, walls). Placing cable under those items wastes material and may cause heat loss or code violations. Make sure you order enough membrane to cover the entire finished floor but only enough cable for the usable heated area. By contacting us and getting our input, you can be certain that your entire floor will be comfortably warm.
7. Cutting the Heating Cable
Never cut the heating cable. Each floor heating cable is designed specifically to consistently maintain heating at the chosen wattage per square foot – each cable size is unique. Shortening the heating cable would lower the resistance and increase the wattage, which can cause the system to overheat. Adding heating cable to the end of another mat or cable will also alter the resistance and the system will not heat properly.
8. Not Preparing the Subfloor Properly
Uneven, dirty, or moisture-heavy subfloors cause problems like cold spots, poor adhesion, and cable damage. Also, a lack of insulation under slabs or along the perimeter allows heat to escape downward. Clean, level, and dry the subfloor before installing. Add insulation board or underlayment if the subfloor is a cold slab.
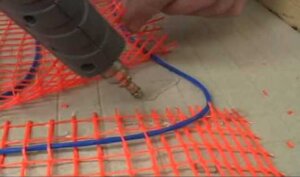
9. Inconsistent Wire Spacing for Cable Systems
It’s very important to choose a wire spacing and maintain it consistently throughout your project. Inconsistent wire spacing leads to inconsistent heating. Consider purchasing one of our mat options to avoid this issue altogether. All mats are pre-spaced, which eliminates the chance of this spacing error. Keep in mind that manufacturers have differing requirements, so look at the instructions or ask us.
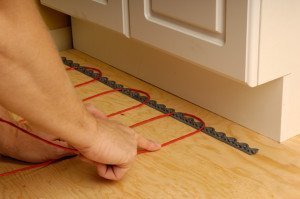
10. Incorrect Thermostat or Sensor Placement
Placing sensor wires too close to walls, windows, or entryways can cause incorrect temperature readings. Using a thermostat not designed for your heating system can also lead to poor performance or failure. Place the sensor wire midway between two heating cables, away from direct drafts. Ensure also that your thermostat comes from the same manufacturer of the rest of your floor heating system to avoid compatibility issues.
Note: If you’re installing DITRA-HEAT cables, having a full DITRA-HEAT system (membrane, cables, and thermostat) is crucial. This ensures not only compatibility but also provides a warranty in case of any complications with your system. Warm Your Floor also has full floor heating kits to ensure warranty protection and compatibility.
11. Buying From an Unauthorized Seller
Ensure you’re buying from an authorized seller to avoid compatibility issues and receive a warranty for your system in case of any complications. Warm Your Floor is an authorized distributor for all products we sell. With over 25 years of experience, our staff is well-trained to handle any issue that may arise. Along with our great customer and tech support, we offer 90-day returns.
Warm Your Floor is Here to Help
Avoiding these mistakes makes your installation smoother and your radiant floor heating system more reliable. If you need assistance planning your layout, checking compatibility, or deciding on the right components, contact Warm Your Floor. Our team can guide you through your installation and answer any questions to make sure your project is done right.
Stay Warm and Informed
Stay one step ahead with expert articles, heating hacks, and product news delivered right to your inbox when you sign up for our newsletter.
Amy Jorgensen says:
Perhaps I missed it in the installation video, but how much height will a Ditra system (both the regular and the insulated one) or SunTouch mat system add to my subfloor? I am doing a remodel and already have existing floors adjacent to the area I want to be warmed. They were all even. I’m hoping to keep the same look and flow.
[email protected] says:
Hi Amy,
The regular Ditra system and most other products we sell add about 1/4″.
The Ditra-Heat Duo is a little thicker at 5/8″.
Let us know if you have any other questions.
Thank you, Amy!
Roland says:
Issue with “Ground fault detected”: this is my 2nd bedroom to install Quiet Warmth radiant heat mats, the first one turned out fine. This room includes 4 mats, i tested each one separately and they read correct (three of them around 40 ohms and one is 80).
I keep getting flashing red light ground fault issue.
I have done various trouble shooting, I then measured the combined resistance of these 4 mats. It comes to 12.5 ohms…can that be correct or way off ?
Thank you
Steve says:
I am using a self leveling mortar that I was planning on doing a little thicker than thinner as the floor has some cracks and I don’t want it to seep through. I let that dry and then do my tile adhesive and tile over the mortar correct?
[email protected] says:
Hi Steve,
Yes, you would pour the self-leveling mortar over the heating element.
Make sure not to have too much mass over the heating element as the more mass will increase the start-up time of the system.
Once that mortar has cured you would then install the tile over that mortar bed.
Jason says:
Im looking at converting a Ram Promaster 2500 into a camper. Do you have recommendations as I would like to install radiant floor heating? I plan on having it underneath vinyl plank or sheet flooring. Ill be running off solar most of the time.
[email protected] says:
Jason,
I would recommend using the QuietWarmth Click-Together Film for floating floors.
You can see that product line here: https://kc.warmyourfloor.com/shop-by-brand/quietwarmth/floating-film.html
And as long as you can supply 120V or 240V power to the thermostat controlling the system you’ll be able to make this work.
David Sanderson says:
Basement living room. 10×10 floor heating space available. Separate dedicated 110v electrical already installed. DIY project; handy with remodeling, minor electrical, carpentry.
Existing concrete floor with existing carpet. Which product can I use for under carpet, but on top of concrete floor or padding?
Scott Cook says:
Hi David,
The SunTouch WarmWire, TapeMats and Underfloor Mat products can be used under carpet.
Some relevant points to make when considering heating under carpet:
-The cable/mat still must be embedded in mortar to heat effectively
-The combined R-value of all floor coverings should not exceed R-3
-Always consult with the carpet manufacturer to verify compatibility with radiant electric heat
The installation steps look like this:
1. Attach the cable or mat to the subfloor or slab
2. Install the floor sensor between two heating wires
3. Make sure the power lead and flor sensor wires are run to the thermostat location
3. Pour self-leveling mortar 1/4” to 1/2” thick, fully embedding the heating wire and splice so that no portion of these are visible
4. Install floor covering after the mortar bed has fully cured
Terry L Kane says:
We have a heated bathroom floor and am in the process of a remodel. Can we install a shower on top of the heated mats? Right now the mats end at the shower, but with the remodel, our new shower will be larger, extending over the current shower size.
Marye Lee says:
Hi Terry,
This may depend on a few factors. Potentially, you could extend the shower over a mat already in the floor if you are covering it with tile, but you will need to be careful not to damage it. Please, give us a call at 866-558-3369 and we can help you out a little further with this project. Thanks, Terry!
Warm Regards,
Warm Your Floor Team
Adam Gottfried says:
Can the tape mat be covered by a thin layer of self leveling concrete prior to ceramic tile installation?
Marye Lee says:
Hi Adam,
Yes, the SunTouch TapeMat must be covered in a 1/4″-1/2″ layer of self-leveler before installing the flooring. Please, give us a call at 866-558-3369 if you have any other installation questions. We will help you out along the way!
Warm Regards,
Warm Your Floor Team
Tomas Zubek says:
Can I install the Nuheat mat over a cork subfloor?
Marye Lee says:
Hi Tomas,
Nuheat does not specify if using a mat over a cork subfloor is acceptable in their manual. We recommend that you get in contact with the cork manufacturer to make sure that they will allow floor heat over the subfloor. Next, get in contact with Nuheat directly to make sure that you will be able to install over this subfloor and do not void the warranty.
If you have any issues with getting in contact with Nuheat, give us a call at 866-558-3369 and we will be able to help you get an answer for this. Thanks, Tomas!
Warm Regards,
Warm Your Floor Team