
Electrical testing is one of the most important steps when installing DITRA-HEAT cables. Each test confirms that the heating cable and its insulation are intact, properly connected, and safe to operate. Performing these tests prevents your system from failing, ensures consistent performance, and protects your Schluter system warranty.
Test 1:–Conductor Resistance

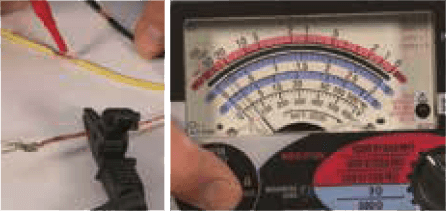
In order to perform the resistance test, you must set your multimeter for resistance measurement and take an ohms reading between the two power leads (120V power leads are black & yellow / 240V are black & red).
To do this:
- Make sure the cable is NOT connected to power or your DITRA-HEAT thermostat.
- Set the multimeter to the ohms (Ω) range.
- Touch the black probe to the first power lead and the red probe to the second power lead.
- Hold steady until the reading stabilizes.
- Compare the reading to the ohms value printed on the cable spool.
If the ohms reading taken on the two power leads varies significantly (10% or more) from the value printed on the spool, it means either:
- the cable has been damaged
- the measuring instrument is not set properly
- it is simply out of calibration.
The ohms measurement (along with the results of the rest of the tests) must be recorded in your Heating Cable Tests Log on the last few pages of the DITRA-HEAT Installation Handbook.
Test 2:–Conductor and Ground Braid Continuity

The heating cable is protected by a ground braid. An electrical insulator prevents any contact between the braid and the two conductors. To make sure there is no contact between the braid and the two conductors, you must perform a continuity test.
Using the continuity test (buzzer logo) function of your multimeter, test your cable between the braid and one of the two power leads.
Here’s how it’s done:
- Ensure the cable is not connected to power/thermostat.
- Set the multimeter to continuity mode (buzzer symbol).
- Clip or hold one probe to the ground braid.
- Touch the other probe to the first power lead (black).
- If there is no continuity (if the test is successful), the multimeter will display, depending on the instrument used, either “OL ” for “over load” or “I” for “infinity”.
- Otherwise, if the test fails, neither “OL ”, nor “I” will be displayed and a warning tone will be heard.
- Move the probe from black to the second power lead (yellow for 120V, red for 240V) and repeat.
Record your test results on the Heating Cable Tests Log on the last few pages of the DITRA-HEAT Installation Handbook.
Test 3:–Insulation Resistance
This test is meant to detect very small breaks throughout the cable insulation.
These breaks often remain undetected during the continuity test since they are not necessarily short circuits between the conductor and the ground braid.
Even small breaks can cause current leakage to ground.
 Current leakage is usually detected by the mandatory ground-fault circuitinterrupter “GFCI” (i.e. a thermostat with integrated GFCI or a panel mount GFCI). When a current leakage is detected, the GFCI trips the circuit, thus disabling your DITRA-HEAT floor heating system.
In order to perform the insulation resistance test, you must use a megohmmeter (MΩ), also known as a “megger”, to take an insulation measurement between the braid and one of the two power leads.
Here’s how to perform this test:
- Disconnect the cable from any thermostat or power.
- Set the megger to 1000 V test range.
- Connect the megger’s ground/guard lead to the ground braid.
- Connect the megger’s test lead to the first power lead (black).
- Press Test and hold for the duration recommended by your megger (often 1 minute).
- Read the value: The insulation resistance measurement must be equal to
or greater than 1 gigaohm (GΩ); 1 GΩ = 1000 MΩ. - Repeat for the second power lead (yellow for 120V, red for 240V).
- If below 1 GΩ, recheck connections. If still low, the insulation may be compromised.
Record your test results on the Heating Cable Tests Log on the last few pages of the DITRA-HEAT Installation Handbook.
Test 4:–Temperature Sensor
Test the floor temperature  sensors using a multimeter to verify accuracy of the sensors.
Follow these steps to complete the test:
- Make sure the sensor is disconnected from the thermostat during testing.
- Set the multimeter for resistance at 10K Ω +/- 2 (at room temperature).
- Take a reading between the sensor leads – Touch one probe to each sensor lead.
- Read the resistance. The resistance will vary according to the temperature (i.e., the colder the sensor, the higher the resistance).
- Compare the measured values with the table of expected values.
- If the reading is far off the table value, try again after letting the sensor sit at stable room temp. If still off, replace the sensor.
Record the results in the Heating Cable Tests Log on the last few pages of the DITRA-HEAT Installation Handbook.
When to Perform These Tests
Each electrical test should be performed three times during installation. Testing at multiple stages makes sure that any damage to the cable is caught early.
- Before installation: Test the heating cable right out of the box. This confirms it’s in good condition from the start and matches the resistance value printed on the cable label.
- After securing the cable in the membrane: Once the cable is pressed into the DITRA-HEAT membrane, repeat all tests. This confirms no damage occurred during layout or embedding.
- After tile installation and before connecting the thermostat: A final round of tests ensures the cable is undamaged after the tile setting and grouting. Only after confirming proper readings should you connect the thermostat.
Conducting floor heating system testing guarantees long-term reliability and safety of your DITRA-HEAT system. Taking a few minutes to test, record, and verify each reading ensures that your floor heating system will perform efficiently, safely, and consistently for years.
We’re Here to Help
If you’re unsure where to start or struggling with conducting these tests, reach out to the Warm Your Floor team. We can help walk you through the process of testing your DITRA-HEAT system.
Stay Warm and Informed
Stay one step ahead with expert articles, heating hacks, and product news delivered right to your inbox when you sign up for our newsletter.
barney rigney says:
what is the maximum sustainable temperature of 240 volt heating cable
[email protected] says:
The maximum temperature you can set depends on the thermostat.
Most thermostats allow you turn the temperature up to between 90-99 degrees Fahrenheit.
Osbaldo Pacheco says:
If I install my own ditra heat system, do
I still get the 25 year warranty. I have a floor plan of my kitchen and I would place it around the new island.
Jacquelyn Sutterman says:
Hello Osbaldo,
Floor heat is a great choice for your kitchen! It’s becoming one of the most popular applications in our customers’ homes. Also, a membrane & cable system works great around fixtures like your island.
The manufacturer of DITRA-HEAT, Schluter-Systems, applies any warranty associated with their products. We suggest contacting them directly for the details on the length and extend of your coverage.
Warm Regards,
The Warm Your Floor Team